Plastic Canvas Crafts
Plastic Canvas Crafts
Plastic canvas is a craft material of lightweight plastic with regularly spaced holes in imitation of embroidery canvas. It is also commonly known as vinyl weave.
Plastic canvas is typically used as a foundation for needlepoint or other canvas work embroidery, usually in acrylic or wool knitting yarn. Due to its rigidity, it is useful for creating 3-dimensional objects such as tissue box covers, small jewelry boxes, handbags, and other decorative objects.
Plastic canvas is also used by some for making animal mascot heads as a frame to build faux fur upon to make the head of the mascot, some people stick the Plastic canvas together with glue but this is not the only method of construction or sticking together a frame of a mascot head.

Plastic Canvas Crafts
Plastic canvas is a craft material of lightweight plastic with regularly spaced holes in imitation of embroidery canvas. It is also commonly known as vinyl weave.
Plastic canvas is typically used as a foundation for needlepoint or other canvas work embroidery, usually in acrylic or wool knitting yarn. Due to its rigidity, it is useful for creating 3-dimensional objects such as tissue box covers, small jewelry boxes, handbags, and other decorative objects.
Plastic canvas is manufactured in many colors and with various size holes for different thicknesses of yarn. As with textile canvas, these are described in count – that is, 10-count plastic canvas has 10 holes per linear inch. Typical sizes are 5-, 7-, 10-, and 14 count. It is most readily available in A4 size sheets but pre-made shapes such as circles, triangles as well as novelty shapes (e.g. dinosaur, bird, cross) are also available.
Plastic canvas is also employed in teaching needlepoint and cross stitch to children, since its rigid structure does not require the use of a hoop or frame.
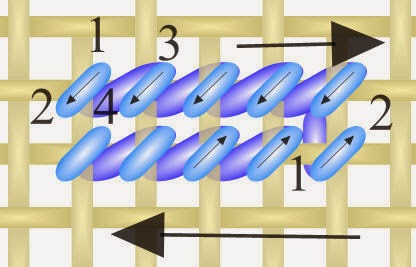
How to do Continental stitch:
Start the top row by following the numbering on the diagram. Each stitch is worked in a downwards diagonal direction over 1 canvas thread (or two if you are using Penelope canvas).Take the needle back up to 3 to start the second, leaving a longer diagonal stitch on the back.When you reach the end of the row, you need to start each stitch at the bottom and head upwards as shown by the arrows. You will get one vertical stitch on the back where you change direction. Continue in this manner to complete the second row.
How to do Basketweave needlepoint stitch:

Start with the blue lines on the diagram. Each stitch is heading upwards but the actual row is going down the fabric. You will get an almost vertical stitch on the reverse.
As with the method above this way of working does use a little more yarn, and a little extra concentration is also needed. shown the second row in pink. You start with stitch a-b and this time both the stitches and the row are going upwards. The stitches on the back will be almost horizontal.
This variation gets its name from the basketweave appearance it forms on the back after a few rows. In fact you can easily tell if you have made a mistake by tell tale stitches going in the wrong direction and spoiling the "weave".
It takes a bit more practice but basketweave doesn't tend to pull the canvas out of shape, making it ideal for large areas of background. For smaller areas, with lots of colour changes, it may be easier to use the continental version.
More crafts Ideas with Plastic Canvas:
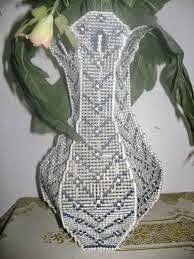 Flower vase with Plastic Canvas
 Jewellery Box with Plastic Canvas
 Table runner with Plastic Canvas
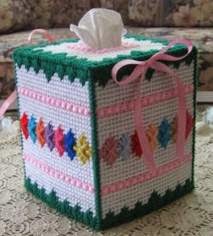 Gift Box or Tissue Box Plastic Canvas
 Clutch Purse with Plastic Canvas
Thanks for Visiting womenspage.in
As with the method above this way of working does use a little more yarn, and a little extra concentration is also needed. shown the second row in pink. You start with stitch a-b and this time both the stitches and the row are going upwards. The stitches on the back will be almost horizontal.
This variation gets its name from the basketweave appearance it forms on the back after a few rows. In fact you can easily tell if you have made a mistake by tell tale stitches going in the wrong direction and spoiling the "weave".
It takes a bit more practice but basketweave doesn't tend to pull the canvas out of shape, making it ideal for large areas of background. For smaller areas, with lots of colour changes, it may be easier to use the continental version.
More crafts Ideas with Plastic Canvas:


Thanks for Visiting womenspage.in
 Posted in: Art and crafts,crafts,GirlsCrafts,home need tips,latest crafts,women tips

 Follow Us on Twitter!