Rakhi Making How to make rakhi at home

Rakhi Making How to make rakhi at home

Raksha Bandhan Date and timings:
18thAugust 2016 (Thursday) 
Raksha Bandhan Thread Ceremony Time - 06:03 to 14:56 Duration -8 Hours 53 Mins
Aparahan Time Raksha Bandhan Muhurat - 13:35 to 14:56 Duration - 1 Hour 21 Mins

Rakhi making at home is very lovely for all the girls. After all, Rakhi is the festival of brothers and sisters. Learn here how to make Rakhi at home.significance of raksha bandhan
How to make Rakhi:
Rakhi is generally a decorated silk thread. It may be a simple thread or it may be decorated with beads or designer motifs, religious symbols or even studded with jewels. Here are a few tip on how you can create your own rakhi.
Material required:
1. Silk threads-multi-coloured(more colors)
2. Cotton thread
3. Beads, sequins
4. Scissors
5. Glue
Take a bunch of silk threads, multicolored if you want a colorful rakhi. Red and yellow are considered auspicious colors. You can also use a strand or two of golden thread. The threads should be around 30" long. Fold the length of the thread bunch to half. Tie a tight knot at one fourth of the length using the cotton thread. Cut the loops of the folded thread and fluff the open ends with a hard brush.

Divide the longer part of the thread into two halves and plat them in desired way. Tie the ends with the cotton thread and fluff the open ends. These two strands will be used for the tying.
raksha bandhan quotes
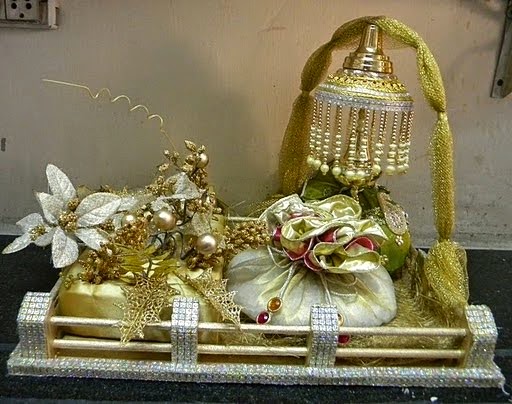
Decorate the upper part with sequins, beads or religious motifs. If you are using multicolored threads arranged in some specific way, cut them short to a suitable length not more than ½".
significance of raksha bandhan

Watch the below video:

Thanks for Visiting womenspage.in

Maddie Bradshaw M3 Girl Designs founder who is 13years age Converted into $1.6 million Brand a year

Maddie Bradshaw M3 Girl Designs founder who is 13years age Converted into $1.6 million Brand a year


Maddie Bradshaw is the President/founder of m3 girl designs, a jewelry company, with annual revenues of around $1.6 million, selling over 60,000 necklaces per month in over 6,000 U.S. retail outlets, including Amazon.com and Nordstrom.

Everything started when the young girl was 10 years-old and wanted to decorated her school locker, but couldn’t find anything interesting and original. When her uncle, who had an old Coke machine, gave her 50 bottle caps, she decided to decorate them herself and put magnets on them. The now 16-year-old recalls: “When my friends saw the caps, they wanted me to make some for them.”

M3 Girl Designs
Ages: 13
Location: Dallas, Texas
2008 Revenue: $1.6 million
2009 Projected Revenue: Undisclosed
Employees: 25
Year founded: 2006
Website: www.m3girldesigns.com
Facebook: www.facebook.com/pages/Snap-Caps-by-m3-girl-designs/91805695911
Twitter: www.twitter.com/m3girldesigns

Their enthusiasm determined Maddie to try something new: design necklaces with a metal pendant to attract the bottle cap, which she called Snap Caps. The Snap Caps aim to capture and celebrate every girl’s unique personality, with themes ranging from initials, music stars and fairy tales. Bradshaw took 50 of the necklaces to a local toy store. In less than two hours, they sold out. The young entrepreneur remembers: “At that point, I knew I was onto something. I think we were successful in the beginning because I was more focused on having fun and less worried about failing.” While she only spent $300 of her own money, matched by her mother, to buy supplies, the young girl already made her first million by age 13.

                                                              M3 Girl Designs

Maddie, alongside her younger sister, Margot, who is the company’s vice-president, creates the jewelry designs. She also attends all the company’s meetings and trade shows. The young entrepreneur has recently added a new line of necklaces, called Spark of Life, which targets an older group, teens. She revealed: ”The great thing about our company is that it’s growing with me.As my tastes change, so will the products.”

"A kid knows what a kid likes," says Bradshaw, who took her bottle cap idea, which she named Snap Caps, and pitched it to a local toy store, Learning Express, in 2007. Selling out of the 50 bottle caps Bradshaw and her mom took to the store  in under two hours Learning Express quickly asked the then-10-year-old if it could carry the Snap Caps in more of its stores throughout Texas.

Now, Bradshaw's designs can be found in hundreds of stores throughout the United States, Canada, and the Bahamas. Snap Caps can be worn on necklaces, in hairpins, or as bracelets. "All my designs are interchangeable," says Bradshaw, whose company now sells 50,000 necklaces and caps every month.

As the founder, president, and head designer of the Dallas-based company, Bradshaw is still a full-time student and plays lacrosse, tennis, and is a member of the swim team. Her 9-year-old sister Margot helps design and paint some of the bottle caps, and is most often the person Bradshaw turns to for advice.

"She always knows what the latest trends are, what my friends and hers are going to like," Bradshaw says. Margot also serves as the company's vice president, while mother Diane is CEO and the person who is responsible for all the financials. "Maddie definitely attends the business meetings, talks about the designs, and goes to trade shows," Diane Bradshaw says.

Maddie's accidental product has become something of a tween-selling powerhouse -- Snap Caps were featured at the Teen Choice Awards and now bring in $1.6 million in revenue. Throughout this summer, Bradshaw has worked with the company's 25 employees, designing more caps and expanding into hair ties and notebooks. "I'm glad I started this company as a kid," Bradshaw says. "I've learned how to market a business  and I think it's really fun."

Bradsaw has also published a book, called You Can Start a Business, Too, after receiving numerous emails from young girls who also wanted to start a business. At the same time, she is striving to create a scholarship to help aspiring young entrepreneurs, as she confessed: ”I love that I have an opportunity to reach out and help others.Not everybody has the money like I did to pay for start-up costs.”

Bradshaw’s initiative has attracted local and national media attention. The young entrepreneur appeared on ABC’s“The View” and the “Shark Tank,” while her work has been featured on the Teen Choice Awards. Regarding her appearance on “The View,” Bradshaw confessed: “I was so nervous about answering questions from Barbara Walters.” She added: “But with each new opportunity to talk about the company in front of people, I gained a bit more confidence and learned that I could do more than I thought I could do.”

While on “Shark Tank” in February 2012, Bradshaw asked the “Sharks,” five investors who listen to business pitches and offer financial and mentoring deals with entrepreneurs, to invest $300,000 in her company, while proposing a 15% stake in the company. M3 girl designs ended up offering 30% equity in the business for the $300k, but obtained considerable value for the additional 15%. Instead of one “Shark” offering to launch her company internationally and mentor her, three investors, Mark Cuban, Robert Herjevic and the QVC Queen Lori Greiner, together worth billions of dollars, accepted to invest in the young girl’s business.

While her own company continues to rise to unexpected heights, Maddie’s Bradshaw advises other young entrepreneurs to: “Follow your passion. If you come up with an idea and you love it, chances are other people will, too.”
This is a True Success Story that is sure to keep growing as the two girls continue to develop their Brand. This is also a very good lesson for all parents in how to encourage their kids that they can accomplish anything they want in life if they are willing to work hard (and smart) for it.
Maddie and Margot may be getting a lot of the attention, but without grounded parent's that were willing to help take a business idea into a multi-million dollar business in a few short years cannot be over looked.  
For Buy M3 Girl Designs click here
Thanks for Visiting womenspage.in

Simple Baby dress Umbrella Dress cutting at Home

Simple Baby dress Umbrella Dress cutting at Home

This is an umbrella cut frock . The name umbrella is because of the umbrella shaped skirt.Lay the fabric you've chosen on a flat work surface. The surface should be able to accept pins and pencil ends being stuck into it, so place a hobby or craft mat, cork board, or similar item, underneath. Ensure that the fabric is sitting flat and is free of any bunching.

Using the length measurement you've chosen, measure this amount along the long edge (horizontal edge) of the fabric. Mark this measurement with fabric marker or a pin.


Using the stitching pattern draw the patterns using paper. First fold the cloth breadthwise then lengthwise, next place the body part stitching pattern and mark the edges and cut them carefully.

Next join the shoulders, then stitch the neck part using cross piece. The next thing to be done is side joints, stitch and join the sides. Cut the center of the back part for the hooks to be stitched.

Next is the body part, keep the pattern on the cloth. The cloth should be folded breadthwise first then lengthwise. In the stitching patter cut and throw the a-e and a-f part and also the part after the big umbrella curve.Next mark the edges and cut them carefully. You can see a umbrella shaped bottom when you unfold the cloth.Stitch and join the bottom to the front part.


Thanks for Visiting womenspage.in

How to cut and stitch a blouse Step by Step in Telugu For beginners Home Made professional touch

How to cut and stitch a blouse Step by Step in Telugu  

The curve on the right is the arm hole while the other curve is neck.First draw a pattern same as the back side then from the top measure 12 inch and draw a straight line. You can see a straight line drawn at a distance of 12 inch from the shoulder. The distance can vary from 12 to 13 inch based on the breast size . A normal women can draw a line at distance of 12" else 13".

Next measure 1/2 inch from the horizontal line and mark it. Likewise measure 1/2 inch above the horizontal line on both the extremes. Now as shown in the above diagram draw a neat curve along the points . I've drawn the curve in blue colour. Next step is to cut along the blue line like the one below. The image below shows the front and the back part pattern together.
Front part is cut into 2 parts. In the first part we have to sew darts then attach the patti part(2nd part) to the front piece.In the above image i've drawn the darts . Those are the places where you have to sew darts.Now let's see how to sew darts using the cloth. Then take the material to stitch blouse. Below is the material i have used. Fold the cloth to the exact breadth size of the pattern once as shown in the figure . Then mark the edges with marking chalk. Next carefully cut the edges without disturbing them. Make sure the neck part is placed on the folded side.

Then 2 small darts have to stitched at the back part straight to the shoulders.

Then the main three darts have to be stitched carefully in the front part. Look at the stitching pattern diagram above for the three main darts. The dart stitched at the bottom should be bigger that the 2 darts at the left and right sides. Darts at the back part and front part are stitched.

Next to the front part , the patti part has to be stitched. After stitching the three main dots , the front part has to be stitched to the patti part. The patti part should have the remaining length so that it equals the back part.Now the patti part is stitched to the main part. See to that both back and front parts are of same length. Then make sure you fold around the bottom line.

Next the front parts have to be joined to the back part. Just do that by stitching the shoulders correctly.

Next sleeve part is cut and attached to the arm. There are 2 options to stitch sleeve, you can join the sides then stitch the sleeve else you can stitch the sleeve and then join the sides. It depends on your comfort level. To cut the sleeve use ur model blouse for size. Just fold the cloth once and place the model sleeve on it, then draw the shape and cut it.After the sleeve part is stitched, the neck crosspeice has to be stitched and then hooks have to be stitched. Finally we finish the complete blouse like this.

 How to cut and stitch a blouse Step by Step in Telugu


Watch this video for How to cut and stitch a blouse Step by Step in Telugu
Thanks for Visiting womenspage.in

How to cut and stitch a blouse Step by Step in Hindi

 How to cut and stitch a blouse Step by Step in Hindi

Learn How to stitch Sari blouse By step by step the method to stitch a blouse is very easy.

The pattern is useful in stitching a cut blouse.
Lets use a readymade measurement to stitch the blouse (refer above diagram). I have used measurements in centimeter, You can do it with inch measurement.

* chest = 91 cm
* full length = 38 cm
* Across back = 35 cm
* sleeve length = 25 cm

FRONT PART

* A - B = full length = 38 cm
* A-C = arm hole = (chest/4)-4 = (91-4)/4 = 18.7 cm
* C-D = chest loose = (chest/4)+2.5 = (91/4)+2.5 = 25.2 cm
* A-I = front part = chest/3 = 91/3 = 30.3cm
* A-E = shoulder = AB/2 = 35/2 = 17.5 cm
* A-F = Neck Breadth = (chest/12)+1.5 = 9 cm
* A-H = Front Neck = chest/8 = 11.3 cm
* K-B = patti part = full length-front part=7.7 cm
PATTI PART (K-B part in the above diagram)

* A-C = full length = 11 cm
* A-B = patti width
SLEEVE PART

* A-B = sleeve length = (chest/4)+2.5
* A-C = sleeve width = (chest/4)+2.5
* E-D = (chest/4-4)Now let's see how to stitch the sari blouse. Before going to stitch the real material , we'll draw the stitching pattern. I have used chart paper to draw the stitching pattern. If u want to stitch a blouse of your size, take a sample blouse you already have and take the measurements using inch tape. It is nessesary to draw stitching patterns for both front and back side .

BACK PART PATTERN


The curve on the right is the arm hole while the other curve is neck.

FRONT PART PATTERN

First draw a pattern same as the back side then from the top measure 12 inch and draw a straight line. You can see a straight line drawn at a distance of 12 inch from the shoulder. The distance can vary from 12 to 13 inch based on the breast size . A normal women can draw a line at distance of 12" else 13".

Next measure 1/2 inch from the horizontal line and mark it. Likewise measure 1/2 inch above the horizontal line on both the extremes. Now as shown in the above diagram draw a neat curve along the points . I've drawn the curve in blue colour. Next step is to cut along the blue line like the one below. The image below shows the front and the back part pattern together.

Front part is cut into 2 parts. In the first part we have to sew darts then attach the patti part(2nd part) to the front piece.
In the above image i've drawn the darts . Those are the places where you have to sew darts.Now let's see how to sew darts using the cloth. Then take the material to stitch blouse. Below is the material i have used. Fold the cloth to the exact breadth size of the pattern once as shown in the figure . Then mark the edges with marking chalk. Next carefully cut the edges without disturbing them. Make sure the neck part is placed on the folded side.
                               After unfolding you can see both sides of the blouse.

Then 2 small darts have to stitched at the back part straight to the shoulders.

Then the main three darts have to be stitched carefully in the front part. Look at the stitching pattern diagram above for the three main darts. The dart stitched at the bottom should be bigger that the 2 darts at the left and right sides. Darts at the back part and front part are stitched.

Next to the front part , the patti part has to be stitched. After stitching the three main dots , the front part has to be stitched to the patti part. The patti part should have the remaining length so that it equals the back part.

Now the patti part is stitched to the main part. See to that both back and front parts are of same length. Then make sure you fold around the bottom line.


Next the front parts have to be joined to the back part. Just do that by stitching the shoulders correctly.

Next sleeve part is cut and attached to the arm. There are 2 options to stitch sleeve, you can join the sides then stitch the sleeve else you can stitch the sleeve and then join the sides. It depends on your comfort level. To cut the sleeve use ur model blouse for size. Just fold the cloth once and place the model sleeve on it, then draw the shape and cut it.

After the sleeve part is stitched, the neck crosspeice has to be stitched and then hooks have to be stitched. Finally we finish the complete blouse like thisTry yourself at home.


Nokia 225 feature phone specifications and features

Thanks for Visiting womenspage.in

Birthday party decoration at home Birthday party decoration at home ideas india

Birthday party decoration at home ideas


Consider the age, gender, interests and hobbies of the guest of honor! Then choose a theme that suits them perfectly.You can go "all out" and make every aspect of the party theme-related, or you can try a lighter touch by including just a little theme-related decoration or food.

Get your guest list made and your invitations out at least 2 weeks prior to the party (more if it's a big event). This way, you'll have an idea of how many people to expect and you can decide on the best location to accommodate your group size.

Make sure you have a way to play your tunes - whether that be just a set of speakers with a phone or music player, or a whole DJ setup.
Even if you're not planning on having dancing, background music really helps set the atmosphere at the party. Make sure you have a range of fast, slow, soft, and quiet songs on hand to fit the mood at different times of the event and get your guests feeling celebratory.

If you're hosting a kids party, pick out some kid-friendly selections that won't drive the parents crazy. If you're hosting a grown-up celebration, make sure you have a range of genres available to suit everybody's likes, and let your guests play "DJ" too.

Balloons and streamers are fun, but they're at every party! Get creative by tying into your theme. A large box can become a doghouse for a puppy party. Small pebbles spray-painted gold can be the treasure for a pirate party, and haystacks make great seats for a Wild West Party.

Serve food relating to your theme, like Hawaiian Fruit Dip for a luau or pigs-in-a-blanket for a barnyard party. Just remember, finger foods are best, particularly for young guests.
To lend an older mood to your party, prepare some more grown-up snacks, like chips and salsa, cheese and crackers, and range of easy-to-prepare appetizers. Make all your options things you can cook or put together ahead of time, so that you can spend the precious hours of the party enjoying your guests' company, rather than in the kitchen.

Keep guests entertained. Provide lots of opportunity for social mingling (particularly for grown-ups), as well as "free play" for kids. But to really keep the celebration going, games always seem to be the hit of the party! There are some great websites out there where you can find activities that tie into a particular theme.
Depending on your number of guests and their ages, you can even have several games running throughout the event. Balance your levels of activity so that there's plenty going on throughout the party; you can try something active like a three-legged race or Twister, followed by lower-key but social games like Pictionary or charades (or board games, for kids).

Expect the unexpected! With kids' parties especially, it is almost a certainty that things will not go exactly according to plan. Be prepared by having extra games and activities, extra goody bags, and a rain plan ready.
For older guests, you may not run into those particular issues, but be prepared with some extra food and activities if you end up with more guests than you expected, and be prepared to reign in the party to cater a smaller crowd if some people don't show up.

Remember the goody bags! Once again, try to keep the goodies relevant to the party theme and the age of your guests. For example the goody bag may contain chocolate bars and toys like grow your own frog etc.
If you're aiming your party at an older crowd, goody bags may not fit the mood, but that doesn't mean you can't send them home with a memento. Take snapshots of your friends being goofy in a make-shift "photo booth" and print them out for guests to take home (or send them along later, if you prefer), or make a fun "grown-up goody bag" with kazoos and party poppers for when people really want to get the party going.

Get snacks that your friends will enjoy, not just you.Don't go to any place unsuitable for younger guests.
Make a pinata out of a balloon and fill it with candy instead of having goody bags. You could do both, if you want.Use books from the library or book store, or surf the Internet for more fun birthday party ideas.

Garlands Galore
A homemade banner can pack a big decorative punch. Check out these designs that can be reused year after year.

Have Fun with Streamers
You can twist, wind, braid, and curl crepe paper. Get a lot of bang for your buck with this affordable and versatile party material.

Cool Dot-Com Decor
Stylish and affordable party supplies from our favorite stores.

Fancy Table
Make your table shine by using the snacks as creative decor. 

Garland: Baby Face
A photo of your little one is just the thing for an intimate family celebration.

Garland: Stick Around
Spell a message by adhering string to cardboard circles with letter stickers.

Balloon banner
You know those impressive balloon banners you see at large charity events and corporate parties? Now you can make one of your own! Design Mom. Simply thread balloons onto some twine until you get the length of banner you need. The best part? It's a grand statement for the minimal cost of a few packages of balloons.

Ginormous flowers
Create a fantasy world where the flora is huge with these ginormous flowers.a perfect decoration for spring birthdays and garden- or fairy-themed parties.

Pom-pom word pennant
Here's another kids' room decoration that would be great for a party: a pom-pom name pennant as seen how to make wire-frame letters and attach pom-poms to them to create a one-of-a-kind pennant. Spell out the birthday boy or girl's name, or even "Happy Birthday" for a banner you can use over and over again.


birthday party decoration ideas for kids at home
birthday party decoration ideas for adults
good birthday party themes
good birthday party themes for teenagers
balloon decoration ideas for birthday party at home

Decorating with Food

Your party guests need to eat so why not use that as an opportunity to stun them with your decorating skills! Here are some tips to get you started.
Use theme related items to hold your food. For example, a clean cowboy hat could hold chips at a western themed party and a milk pail could hold cookies at a farm party. Look around your kitchen for ideas and look in the toy box too!
Use your theme to inspire the food you serve and then label things accordingly. For instance, if you were having a Dinosaur Party you could label vegetables are for herbivores and hamburgers are for carnivores. Action figures, toys and stuffed animals can hold the food labels next to each dish.
Yummy treats such as cupcakes, cookies and candy are naturally colorful and can add flare to your food table. Top cupcakes with small toys or candy, wrap cookies in decorative tissue paper and place colorful hard candy in mason jars to make your food table pop.
Place large swirl lollipops in pretty vases along with silk or tissue paper flowers. Pass these out as favors for your guests. You can even add a personalized sticker on the front of each lollipop to send your guests a special message.
Arrange cupcakes in the shape of your child's age on the party table. You can also arrange cupcakes in rows that are decorated with the letters that spell "Happy Birthday."
Silly straws come in a variety of fun shapes and can also be taken home by your guests. Make sure to use silly straws with tall cups to prevent tipping or trim the bottom of each straw before serving in smaller cups.
Use cookie cutters to cut sandwiches into different shapes. Use shapes that match your party theme. For instance, star shaped cookie cutters can be used for a Rock Star or Space Party.
Finish the party off with the perfect party cake. Use a Wilton cake pan that matches your party theme or check out  more ideas.
Decorating Crafts
If you have the time, you can impress your guests by making some of the party decorations yourself.

Fold a Basic Napkin Utensil Holder: Create a colorful utensil pouch out of a paper dinner napkin. This decorating tip includes step-by-step folding instructions with photos and display ideas.

Fold a Fancy Napkin Utensil Holder: Here is another way you can fold a paper napkin into a utensil pouch. Step-by-step folding instruction with photos and display ideas are included.

Kirigami Picnic Baskets: Kirigami is just like origami except the paper is cut and folded. This craft is a perfect way to make nametags for your guests. All you need is origami paper and our folding instructions to create beautiful nametags or favor holders.

Tissue Paper Flowers: Not only can tissue paper flowers be used as centerpieces but you can also make large ones and then hang them from the ceiling. Small flowers can be placed behind each guest's ear at a luau or garden party. Choose your size and get creative with this easy decorating craft.

Balloons and Streamers

The ceiling isn't the only place to hang balloons from a string or tape streamers. Be creative while decorating. Choose colors that match your party theme

Here are some balloon and streamer ideas to inspire you.
Decorate balloons with construction paper, markers and tissue paper to create animal faces. Just tape on ears and draw on the face with a permanent marker.
Create a balloon canopy by hanging a tarp or sheet from four poles above the party table. Then fill dozens of solid color balloons with helium and let them float under the canopy without strings.
Create a balloon ball pit by blowing up dozens of balloons without helium and placing them in a boxed off area. The children can walk around in the balloon pit and toss them in the air.
Tape balloons to the wall in the formation of your child's age. This will create a dramatic and colorful wall display.

Wrap streamers around poles, stairwells and chairs. You can leave white space while wrapping the streamers or completely cover the surface to create a solid colored decoration.
Create a streamer chandelier by gathering 6-8 long streamer strips by one end. Tape one end to the ceiling and then fan out the strips to all corners of the room. This will look really pretty if you use alternating colors or rainbow colors.
Honey varieties Types of Honey Honey from the flowers of Neem Honey 300 Types of honey
Thanks for Visiting womenspage.in

Saree packing ideas at home how to make saree packing trays at home Wedding Saree Trays wedding packing showcase

How to make saree packing trays at home


Decorate Wedding trays with mirrors and kundan stones. You can make these trays for wedding purposes. you can gift anyone. These trays are easy to make in different designs, sizes and fabrics. These tray can be used in wedding theme or saree packing.

Wedding Saree Trays are now created with decorative work.These trays are prefferably used for wedding packings like Saree, Lehenga. The trays are already decorated, you have to just put your packings and your presentation is ready.Suits, Gents Pant Shirtsto your relative with a presentative manner.


Saree packing ideas at home


wedding packing showcase
Exclusive range of designer packing solutions
Showcase your best and most elegant clothes, jewellery and accessories
Contemporary gift packing for pre-wedding, post-wedding, ceremonial and other events
Creative packing to suit your specific colour scheme, mood, theme or setting
Customisation and co-ordination of all elements of your event and decor
Unique and distinctive 'Matki' style packing of Ghar-Cholu, Chundadi or any other Bridal garment.
Unique and Beautiful Hand Decorated Coconuts (using real Coconuts and with His and Hers options)
Sakkar Pouches (to compliment and match the Decorated Coconut with His and Hers options)
Presentation Chaabs (for presentation of Bride's/Groom's Trousseau)
Presentation Trays (for presentation of Jewellery Sets, Anklets, Money Envelopes, Mithai)
Fresh Fruit and Dry Fruit Baskets / Trays / Platters (customised to compliment your specific colour theme)


Thanks for Visiting womenspage.in

How to make pooja thali at home decorative aarti thali how to make puja thali at home Diwali Thali Making

How to make pooja thali at home


Decorative aarti thali these aarti thali also know as pooja thali , puja thali , wedding thali , decorative thali , decoration thali , wedding phokhana thali , navratari thali , decorative metal thali , aarti thal , pooja thal , puja thal , owernachi thali , hawan pooja thal , aarti thali.

Decoration of a Puja Thali
Take a thali made of any metal such as copper, steel, gold, silver or brass,of any shape and with less designs as it need to decorate much.
Put a colourful designer packing paper sheet or cloth on the plate and keep all the puja imple ments on the plate.Otherwise,spread ghee or butter on the plate and put some roli small bowl and mix a little bit of water to produce a paste.Now with this roli paste draw the holy symbols like the 'Om', the 'Swastika' and the 'Shree' on the plate or the thali.
To change the look of the thali or the plate into a green look then use the betel leaves put it on the thali or plate.The colourful puja implements when put into the green thali or plate it will have amarvelous look.
Put petals of different flowers such as rose, marigold or any other,of different colours and decorate it on the thalis or plate.
The decoration of the thale or plate can be done by the use of different type of rangoli colors and putting diyas on it.
The decoration of the thale or plate can also be done with rice grains and Kumkum and put some flowers on with the diyas .
The thali or plate can also be decorated with water paint by drawing different types of symbols such as Om and Swastika.Without drawing on the thali or plte paste designers stickers on it.

There are many more implements used in decorating an integral
part of a traditional Hindu Puja Thali :
Bells (Ghanta/Ghanti)
Betel Leaf (Paan)
Betel Nut (Supari)
Camphor (Kapur/Kapoor)
Coconut (Nariyal)
Desi Ghee/Clarified Oil
Havan Samagri
Honey (Madhu)
Kumkum (Roli/Sindoor)
Lamps/Diyas (Diyas)
Panchagavya
Other Puja Thali Items
Other Implements of Puja Thali
Akshat or Rice Grains :The unbroken rice grains are Known as Akshat.It is also prefer to the brain's steadfastness and firmness.It is also the symbol of peace. It is given at the foot of the deities by uttering the mantras to gain wealth and prosperity. The mantra is:"Akshtaashcha Surshreshtth Kumkumaaktaah Sushobhitaah. Mayaa Niveditaa Bhaktyaa Grihaann Parameshwar."

Hand Spun Flower:Hand Spun Flower are beautiful hand-woven garlands made of flowers and fibres such as wool,cotton,etc. are the important implements use to decorate the idols of any God or Goddess which is regularly follwed.
Panchpatra & Pali (Charanamrit Set):Panchpatra & Pali set is made of brass and it is an important part of puja.In it the the holy charan amrit is put infront the deity at the starting of the puja and it distributed among the people totally.The meaning of Charanamitra, Amrit (Holy Nectar) from the Charan (Feet of the Lord) of the God worshipped and it is the sacred gift at end of the puja.
Niranjan:It is an important part of any rituals or puja.It is a decorative wick-lamp holder in which five wicks are kept in oil or ghee.
Cotton:It is used to make cotton wicks at time of kindling the lamp in any festival Puja.At the time of ritualistic "Abhishek" or "Snana" of the deity is made, a packet of cotton is given or used as a symbol of clothing.
Sacred Red:It is a red cotton thread and it is an important accessories of the puja.Mouli or Kalawa is a roll of red cotton thread which is very sacred and used in Hindu rituals.It is bind around the Sadhana accessories,that is it is bind around the copper tumbler filled with water.On its mouth five mango leaves are kept with a coconut and a red cloth on them and this i known as "Kalash Sthapana".The red sacred thread is bind around the wrist of the members of one's family,before starting the Puja.All married men and women wear it on their right hand and the others wear it on their left hand.Only in the case of Brahmin females the above rules of wearing the thread is not applicable.The thread is weared to signify of getting God's blessings.

Abir:It is an important implement of the Puja.It is Mainly used put a mark that is to put "tilak" on the forehead of the deity and also used to decorate.
Haldi:Haldi or Turmeric is used For puting "tilak" on the forehead of the deity.It also used to decorate.
Janeu or Janou:It is the most important integral of the Hindu culture,which is to wear the sacred white thread.It is compulsory and very important to wear the sacred thread while performing any Puja.Upanayan Sanskar is held at the time when an unmarried boy the Janeu is granted and after this one can perticipate in in any Vedic ritual.
Dry Fruits:Different type of dry fruits are used in Puja thali,it consists of almonds, cashews, walnuts, kismis & pista.

puja thali are used in ganesh uttsav for doing pooja of lord shree ganesh , ganesh aarti thalis which  are used for pooja archana of lord shree ganesh.

Puja Thali Decoration:


Diwali THALI MAKING

Diwali is the puja of Lights,Crackers and sweets.On this day Lord Laxmi(Goddess of Wealth) and Lord Ganapati(the Lord of Wisdom) is worshipped,to get wisdom and prosperity in the life of people.Diwali is a big puja where one's hole family sits and prays together to the deities with various important materials like like flowers, sandalwood, kumkum, aroma sticks, diya and panchamrits.


Navratri Aarti Thali Decoration

On the occasion of Navratri, the aarti thali is considered to be an important item to perform a puja. The aarti thali which consists of decorative puja items look pretty when placed on the puja table. There are certain essential things which needs to be placed on the Navratri aarti thali in order to make it look beautiful and attractive. The thali plate consists of lamps, kumkum and of course an idol looks very authentic when placed on a beautiful plate. There are different types of plates available in the Market which you can make use of. However, the steel plates are commonly used. But, today, copper thalis are becoming a hit! Copper thali are much better to use for Navratri because it is lighter in weight, and thus makes it easier to perform the puja too.
Gold Rate Today
Silver Rate Today


Thanks for Visiting womenspage.in

Crafts of Andhra Pradesh Famous Crafts Andhra Pradesh

Crafts of Andhra Pradesh


Indian Handicrafts have made a name for themselves the world over. Ancient skills have been honed to perfection by craftsmen who have learnt the trade from their fathers, as did their fathers before them. This tradition continues over the centuries, safeguarding the wide and varied artistic wealth of India.

Today, this tradition unfolds itself in an overwhelming variety of products, combining aesthetic appeal with utilitarian value. To satisfy modern tastes and meet international demand, design institutes have been giving a new look to these traditional crafts. A variety of products is available today in all their regional splendour.

These beautiful items are like a breath of fresh air in this age of mechanisation and mass production. The high caliber of skills exhibited in creating the products has stood the test of time. What's more, craftsmen have shown great ingenuity and flexibility in adapting to the requirements of the modern age.

Each region of India abounds in handicrafts reflecting the genius of its local craftsmen. Andhra Pradesh in the south has the distinction of having all important categories of handicrafts practiced in their traditional locations spread over different parts of the state.

Karimnagar is well known for silver Filigree of superior quality created by master craftsmen.

Bidri is another prized product of Andhra Pradesh popular in different parts of the world.

The skills of artisans can be seen in caskets, vases and trays.While places like Nagarjunakonda and Amaravathi have influenced the growth of stone-carving in places like Durgi, wood-carving received its impetus from the temple sculptures. This has made possible the creation of a variety of products in the shape of both figurines and panels that depict them from temple chariots and Gopuram (typical Hindu temple domes).

Metalware has found a new expression in the context of Andhra Pradesh with exquisite pieces of sheet-metal art deriving its motifs from the historic monuments of the Kakatiya sculpture. At the same time, the art has successfully adapted itself to imbibing the use of Persian and other motifs. This has resulted in the evolution of a whole range of utility-cum-decorative items like plant pots, vases, wall decorations and stationery items. Cast art metalware, including icons and temple sculptures depicting various themes, is also produced in certain parts of the state.

Nirmal painting, unique for reproducing motifs from the well-known art schools, has greatly expanded its market by evolving a number of household items which include large-size furniture for drawing, dining and bedrooms.

Leather puppet-making is yet another speciality which has made its way into Andhra Pradesh and developed its roots in different parts of the state. Originally conceived to meet the needs of the shadow puppet troupes, this technique is being increasingly adapted to evolve articles of home decoration.,

Andhra Pradesh has created a niche for itself in the wooden toy industry, combining both carving and painting to present interesting themes, such as village occupations, models of mythological figures, and animals in both stylised and natural forms.

Andhra Pradesh has its claim on some of the most distinguished crafts like the Kalamkari work with its origins traced back to antiquity. Kalamkari, with its resist process and application of vegetable dyes has made an impact in various parts of the world. The Kalamkari craft, as it has recently evolved in Srikalahasti, offers themes in the form of small and large decorative panels ideal for household and office decoration.

Andhra Pradesh has a rich tradition of handloom textile which has attracted attention from both within and outside the country. By carefully assimilating some of the best features of weaving styles and techniques without sacrificing on the originality, and showing a high degree of flexibility to change, the artistic handloom weaving industry of Andhra Pradesh has emerged as a potent source of some of the most unique products made in the country. The world-famous Tie and Dye cloth with its more recent innovation in furnishing fabrics, the well-known brocade and silk saris of kothakota and Gadwal, the famous Narayanpet saris and superfine Venkatagiri saris, besides Pondur Khadi are among the better known handloom textiles from the state.

The mirror embroidery of the style practised by the tribal women Banjaras, nomenclatured "Banjara Embroidery" is another important craft. It offers possibilities for the profitable use of embroidery skills of this economically backward community in the state.

Andhra Pradesh has a place of pride in floor coverings too. Carpets of Eluru and Warangal have long been known not only within the country but also in many parts of the world. All natural-wool pile carpets produced in these places are a speciality. The artistic Durry industry evolved in and around Warangal. Durries with floral and figurative motifs have contributed significantly to exports.

“Lepakshi”, the well-known temple town in Andhra Pradesh, is a repository of stone sculpture and frescoes of a high order attained during the Vijayanagar period. LePakshi as a name has thus aptly been chosen by the Andhra Pradesh Handicrafts Development Corporation as a name for its Marketing Wing., LePakshi serves as a vital link between the lover and buyer of objects of beauty and the legendary handicrafts of Andhra Pradesh. “Lepakshi” Emporia have endeavoured to project the artistry and elegance of Andhra Pradesh Handicrafts in order to create an impact on markets within the country and abroad.

Andhra Pradesh has a rich tradition in handicrafts, with techniques of craftsmanship handed down from generation to generation.

Banjara Embroidery 
Bidri 
Bronze Castings 
Budithi
Crochet Lace
Dokra
Filigree 
Folk Paintings
Ikat
Kalamkari and Block Printed Fabrics
Lacquerware
Nirmal 
Puppets, Toys and Dolls
Sari
Sheet Metal
Stone Carvings
Wood Carvings


Thanks for Visiting womenspage.in

Recycled Plastic Bottle Chandelier how to make plastic bottle chandelier

plastic bottle chandelier 


plastic bottle chandelier 
Builds each chandelier from plastic bottle petal bases, linking their modules together with a simple tag.Once a plastic drinks bottle is empty, it is perceived as redundant and then thrown away.Don't through bottles and recycled them.Innovate yourself different crafts for home decoration. 
More Ideas with plastic bottle:


Recycled plastic bottle chandelier Composed entirely from cut-off bottle bases, it lit up the floor at redesign‘s Lighten Up exhibition .


Thanks for Visiting womenspage.in

Plastic Canvas Crafts how to make plastic canvas crafts plastic canvas crafts ideas

Plastic Canvas Crafts


Plastic Canvas Crafts

Plastic canvas is a craft material of lightweight plastic with regularly spaced holes in imitation of embroidery canvas. It is also commonly known as vinyl weave.

Plastic canvas is typically used as a foundation for needlepoint or other canvas work embroidery, usually in acrylic or wool knitting yarn. Due to its rigidity, it is useful for creating 3-dimensional objects such as tissue box covers, small jewelry boxes, handbags, and other decorative objects.

Plastic canvas is manufactured in many colors and with various size holes for different thicknesses of yarn. As with textile canvas, these are described in count – that is, 10-count plastic canvas has 10 holes per linear inch. Typical sizes are 5-, 7-, 10-, and 14 count. It is most readily available in A4 size sheets but pre-made shapes such as circles, triangles as well as novelty shapes (e.g. dinosaur, bird, cross) are also available.

Plastic canvas is also employed in teaching needlepoint and cross stitch to children, since its rigid structure does not require the use of a hoop or frame.

Plastic canvas is also used by some for making animal mascot heads as a frame to build faux fur upon to make the head of the mascot, some people stick the Plastic canvas together with glue but this is not the only method of construction or sticking together a frame of a mascot head.

How to do Continental stitch:

Start the top row by following the numbering on the diagram. Each stitch is worked in a downwards diagonal direction over 1 canvas thread (or two if you are using Penelope canvas).Take the needle back up to 3 to start the second, leaving a longer diagonal stitch on the back.When you reach the end of the row, you need to start each stitch at the bottom and head upwards as shown by the arrows. You will get one vertical stitch on the back where you change direction. Continue in this manner to complete the second row.

How to do Basketweave needlepoint stitch:


Start with the blue lines on the diagram. Each stitch is heading upwards but the actual row is going down the fabric. You will get an almost vertical stitch on the reverse.

As with the method above this way of working does use a little more yarn, and a little extra concentration is also needed. shown the second row in pink. You start with stitch a-b and this time both the stitches and the row are going upwards. The stitches on the back will be almost horizontal.

This variation gets its name from the basketweave appearance it forms on the back after a few rows. In fact you can easily tell if you have made a mistake by tell tale stitches going in the wrong direction and spoiling the "weave".

It takes a bit more practice but basketweave doesn't tend to pull the canvas out of shape, making it ideal for large areas of background. For smaller areas, with lots of colour changes, it may be easier to use the continental version.

More crafts Ideas with Plastic Canvas:

                                                         Flower vase with Plastic Canvas

                                                   Jewellery Box with Plastic Canvas

                                                          Table runner with Plastic Canvas

                                                  Gift Box or Tissue Box Plastic Canvas

                                                          Clutch Purse with Plastic Canvas

Thanks for Visiting womenspage.in

How to make a garland with satin ribbons

How to make a garland with satin ribbons


Silk/satin roses are great for decorating, enhancing clothing on special occasions, and making craft projects.Learn yourself how to make your own roses out of ribbon, satin, or silk.


Choose a material color. Reds and pinks are traditional rose colors, but you might want to make a yellow, white, or even a black flower for a different effect.

Cut the strip to about 8in (20cm) long. If it is shorter, it is harder to work with, and if it is longer, there will be far more ribbon than is required for a rose. Note that since you will cut the ribbon again when the flower is complete.

Grab one of the loose ends of ribbon and slowly pull it out of the folded accordion. Be sure to keep the other end stationary as you pull. This will bunch the folds of the accordion more closely together, making a little knot of petals. Pull until the rose is the size and shape you desire, but note that if you pull too far, the folds will pop right out and the rose will be undone cut the excess ribbon.
Recycled Plastic Bottle Chandelier how to make plastic bottle chandelier
How to make a garland with polyester cloth
Birthday party decoration at home Birthday party decoration at home ideas india

How to make a garland with polyester cloth

How to make a garland with polyester cloth


Make beautiful garland with pollster cloth.watch the video make yourself for your home decorative.

Thanks for Visiting womenspage.in

Foam Flower Crafts for Kids Crafts

Foam Flower Crafts for Kids


                                                           Foam Flower Crafts for Kids
Learn how to make Foam Flower Crafts for Kids.Cut a circle out of a sheet of foam.
The circumference of the circle can be as small or as large as you want. Fold the circle in half. Make sure it's folded neatly, so that the shape of the calla lily will turn out right. Alter the circle to create a rounded heart shape. Start by placing the scissors at the bottom point of the folded foam. Cut along the edge of the circle, then dip the scissors in at the top of the circle to make a rounded edge. when you unfold the circle, it should look like a rounded heart, with two subtle humps at the top; the bottom of the heart should remain rounded. The classic heart shape has a sharply pointed bottom tip, but in this case you want to keep the bottom rounded with a slight point.

Gather the lily bloom around the pipe cleaner. Put a dab of hot glue on the front of the yellow pipe cleaner right at the cleft in the lily bloom. Take the two sides of the lily bloom (right where you made the slit) and pinch them together in front of the pipe cleaner, pressing them down so that they stick to the hot glue dab. You can add an extra dab of hot glue between the sides to help them stay in place. 

Make a stem out of a green pipe cleaner. Wrap the top of the pipe cleaner around the base of the yellow pipe cleaner, so that the yellow is completely obscured. Leave the tail of the green pipe cleaner straight, so it resembles a stem.

                                              The cylindrical shape of a calla lily bloom

Other ideas with Foam Flower Crafts:

                                                               Foam Flower Box

                                     Foam Flower Crafts Photo frame tree
Thanks for Visiting womenspage.in

How to make Flying flower cups crafts

 How to make Flying flower cups


You need:
coffee cup and saucer
two-wire cable(depending on the height of the cup)
scissors
hot glue gun
faux flowers

How to Make:


Fill the cup with flowers and greenery with glue gun closely as possible.Then proceed with the wrapping wire. Glue the flowers around the wire, they will add volume. Then move on to the saucer and arrange the flowers so that they look like they were spilling in it.The same way you can make the flying cups with other flowers with different colors, or you can make Easter eggs and chickens.
Thanks for Visiting womenspage.in

Plastic Water Bottle Flowers Recycle plastic bottles crafts

Plastic Water Bottle Flowers


How to make beautiful and colorful flowers out of recycled plastic water bottles.
if you paint only at the back side of the flower, it will get the glass like shiny look from the front view.

Best recycling idea..we can use them with lights, vases and as garlands. It would be great if you use these flower lights on outside plants.Can also be used as water floating flowers and lot more..


Thanks for Visiting womenspage.in

Older Posts Home

 
Design by Free Interview Questions | Bloggerized by Lasantha - Premium Blogger Themes | Press Release Distribution